Photographing Birds in Flight
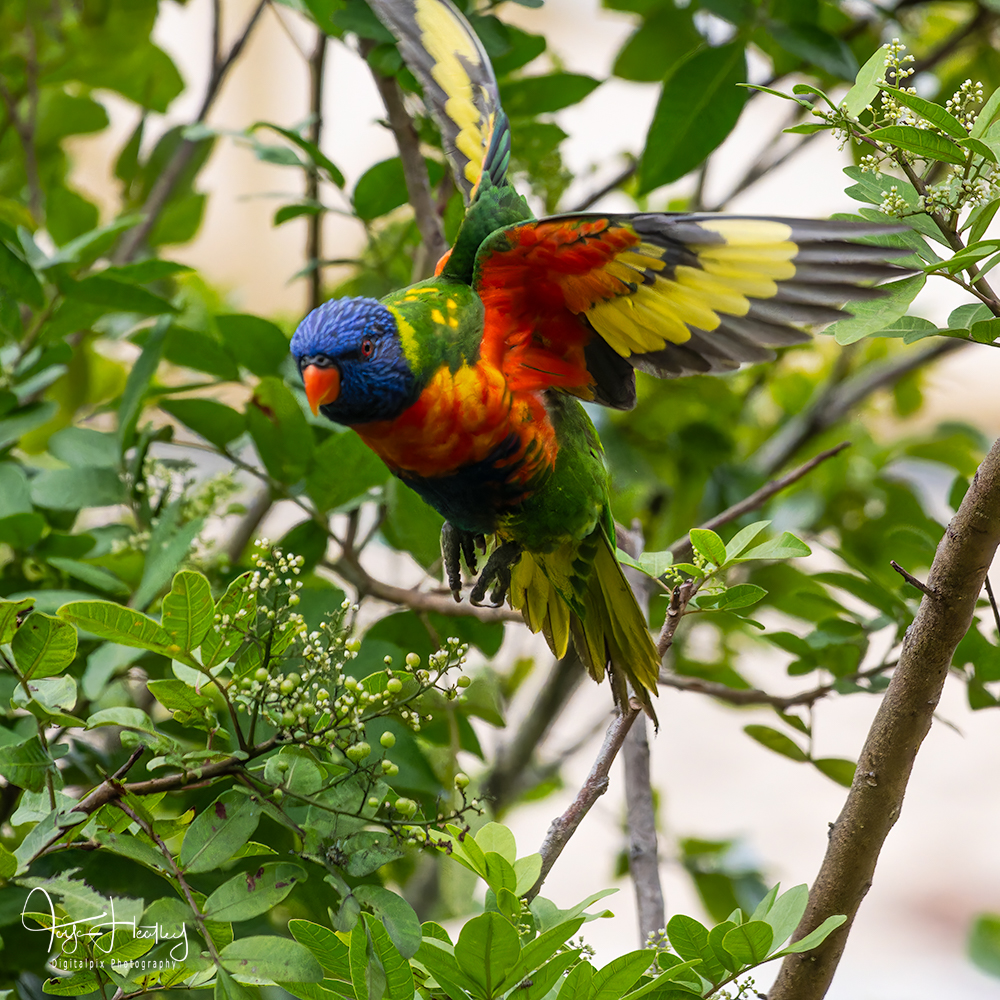
Other than kingfishers and silvereyes, I haven’t really bothered too much about photographing birds in flight. I always found it too difficult to focus on the birds with my shaky hands. On a recent trip to Brisbane to visit family, I decided to spend some time to see if the G9II made the task any easier for me. Backyard birds became my practice subjects once again and, in this case, they were colourful rainbow lorikeets.
I like to learn by doing instead of watching videos or reading books. I enjoy experimenting and changing up what I already know and adapting to create the conditions I need for my vision. So, after a bit of playing around with the camera, it wasn’t long before I was capturing some beautiful bird in flight images and the bright colours of the lorikeets were really the icing on the cake. Keep reading to find out how I achieved these images.
Study, and know your subject:
The rainbow lorikeets are very intelligent birds and while I was studying them, they were watching me too. They quickly worked out just how long I could hold the camera before I had to rest my arms and it was usually at that point when they would take flight. However, I am super stubborn and started to notice they would dip their heads in the direction they intended going before taking off. I waited until I saw this behaviour before lifting the camera to focus on them. This allowed me to capture the take off as well as the flight. The more you notice about your subject’s behaviour, the better the chances are of predicting their behaviour.
Use the correct focus settings:
Most of my bird photography is done using a tiny single focus point. This allows me to choose which part of the bird I want to be sharp, usually the eye and beak. With birds in flight, I want that and more. So, I changed to multiple focus points with animal/bird tracking on. This made it easier for the camera to pick up the bird and track it while in flight. I didn’t get it right first time though. I had loads of images where the bird had flown out of my frame. This takes practice.
Use continual shutter or burst mode:
I generally use burst mode all the time, as it helps me to compensate for my shaky hands. To capture a moving subject, you are going to need more than a single click, so this is an important step. You might get lucky but more often than not, you will miss the bird if you do not use continual shutter or burst mode.
Speed up the shutter:
Aim for at least 1000 sec or above depending on the speed of your chosen subject. For example, a kingfisher will require a speed of around 4000 sec, and I now know that rainbow lorikeets are just as fast!
There are many ways to increase your shutter speed. I personally use a high ISO to achieve my desired shutter speed. It should be noted here that I always, ALWAYS use aperture mode for my nature photography. Manual mode and I are not a good mix, so I just don’t use it. I appreciate that it works well for others, but we are all different and I am a supporter of doing your own thing to achieve the results you are looking for.
Ultimately the best way to get your shutter speed fast enough is to be where the light is. A bight sunny day can give you great speeds, you just need to position yourself so as not to get too many shadows on the birds. Generally, it is a good idea to keep the sun behind you.
Putting it all into practice:
With all the right preparations completed, then it is up to your level of patience. Great images don’t happen without the preparation work, and they don’t happen if you lack in patience.
One of the things I enjoy most about bird photography is the time I spend just sitting, watching, and waiting for that perfect opportunity to capture my vision. It is relaxing and fun, and if it is not that for you also then I suggest you try something different.
This article was first published on the New Zealand Photographic Society’s bi-monthly ezine, NZ CameraTalk June 2024.


